หลักการของการทำเม็ดแบบฟลูอิไดซ์เบดผงคืออะไร?
บทบาทของแท่นกดแท็บเล็ตสมัยใหม่ในการสร้างแท็บเล็ตที่สมบูรณ์แบบ
วิธีใช้เครื่องทำแคปซูล คู่มือเริ่มต้นใช้งานแบบทีละขั้นตอน
การแนะนำ
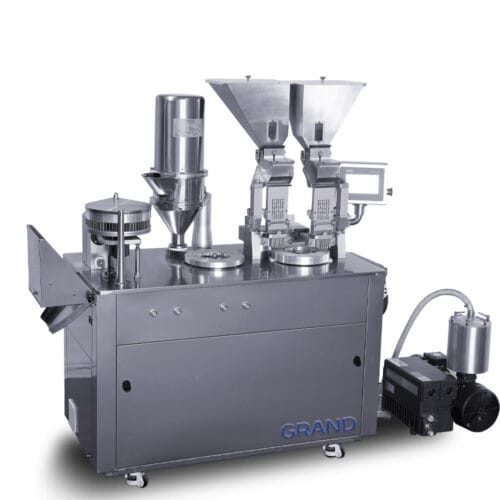
การนำทางสู่โลกแห่งการผลิตยาและอาหารเสริมอาจมีความซับซ้อน แต่ด้วยอุปกรณ์ที่เหมาะสมและแนวทางที่ชัดเจน กระบวนการนี้จะง่ายขึ้นอย่างมากในการจัดการ เครื่องบรรจุแคปซูลแบบกึ่งอัตโนมัติคือรากฐานสำคัญของการผลิตที่มีประสิทธิภาพ ให้ความสมดุลที่สมบูรณ์แบบระหว่างระบบอัตโนมัติและการควบคุม หากคุณเคยสงสัย วิธีใช้เครื่องบรรจุแคปซูล, คุณมาถูกที่แล้ว
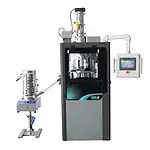
คู่มือนี้ใช้ความแข็งแกร่ง แกรนด์แพ็คแมชชีน เครื่องบรรจุแคปซูลแบบกึ่งอัตโนมัติดังตัวอย่างของเรา จะแนะนำคุณเกี่ยวกับขั้นตอนการเริ่มต้นใช้งานที่สำคัญ ในส่วนที่ 1 เราจะเน้นที่การตั้งค่าพื้นฐาน ตั้งแต่การต่อสายไฟไปจนถึงการบรรจุแคปซูลเปล่าชุดแรกของคุณ ต่อจากนี้ เครื่องบรรจุแคปซูลแบบกึ่งอัตโนมัติ GRAND คู่มือผู้ใช้ จะช่วยให้คุณเริ่มการผลิตได้อย่างปลอดภัยและมีประสิทธิภาพ
ขั้นตอนที่ 1: การเชื่อมต่อที่ปลอดภัยเพื่อการทำงานที่ปลอดภัย
ก่อนที่คุณจะเริ่มคิดถึงการผลิต คุณต้องตรวจสอบให้แน่ใจว่าเครื่องจักรได้รับการเชื่อมต่ออย่างถูกต้องและปลอดภัย ขั้นตอนเริ่มต้นเหล่านี้มีความสำคัญอย่างยิ่งต่อประสิทธิภาพของเครื่องจักรและความปลอดภัยของคุณ
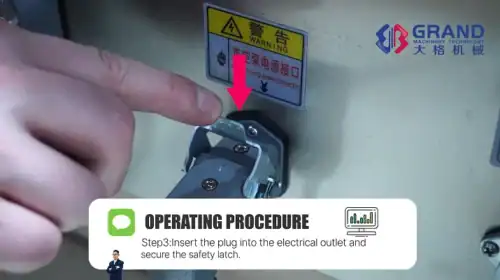
ขั้นตอนที่ 1: เชื่อมต่อแหล่งจ่ายไฟหลัก
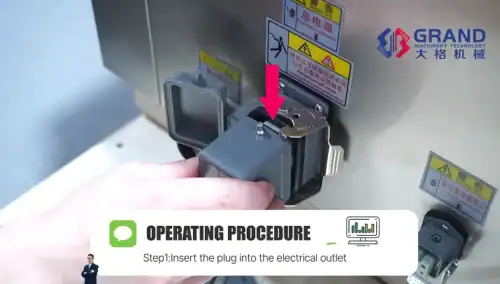
ขั้นแรก ให้หาสายไฟหลักของเครื่อง ดังแสดงในภาพ คุณต้องเสียบปลั๊กแบบมาตรฐานอุตสาหกรรมเข้ากับเต้ารับไฟฟ้าบนตัวเครื่องให้แน่น

เมื่อเสียบปลั๊กแล้ว คุณต้องยึดให้แน่น พลิกสลักนิรภัยโลหะครอบปลั๊กแล้วกดลงจนกระทั่งล็อคเข้าที่ วิธีนี้จะช่วยป้องกันไม่ให้สายไฟขนาดใหญ่หลุดออกโดยไม่ได้ตั้งใจขณะใช้งาน ซึ่งอาจทำให้เกิดไฟกระชากหรือไฟดับกะทันหัน ซึ่งอาจทำให้อุปกรณ์เสียหายได้
ขั้นตอนที่ 2~3: เชื่อมต่อปั๊มสุญญากาศ
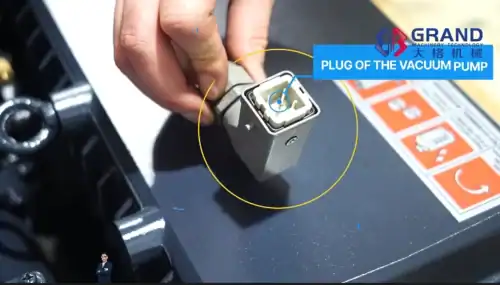
ปั๊มสุญญากาศเป็นส่วนประกอบสำคัญที่ทำหน้าที่แยกตัวแคปซูลออกจากฝา ปั๊มสุญญากาศต้องต่อสายไฟเข้ากับตัวเครื่องหลัก ระบุปลั๊กเฉพาะสำหรับปั๊มสุญญากาศ
เสียบปลั๊กนี้เข้ากับเต้ารับ "ปลั๊กต่อไฟฟ้าปั๊มสุญญากาศ" ที่กำหนดไว้บนตัวเครื่อง เช่นเดียวกับแหล่งจ่ายไฟหลัก ให้ยึดสลักนิรภัยให้แน่นหนาเพื่อให้การเชื่อมต่อมีเสถียรภาพและต่อเนื่อง
ขั้นตอนที่ 4: เชื่อมต่อท่อลมอัดและท่อสุญญากาศ
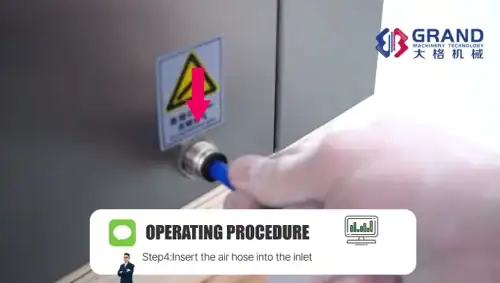
เครื่องบรรจุแคปซูลสมัยใหม่ใช้ระบบนิวแมติกส์เพื่อการเคลื่อนที่ที่ราบรื่นและแม่นยำ ต่อท่อลมอัดสีน้ำเงินเข้ากับช่องรับลม เพียงแค่ดันให้แน่นก็ล็อกเข้ากับข้อต่อสวมเร็วได้ การไหลเวียนของอากาศนี้ช่วยขับเคลื่อนกลไกการทำงานต่างๆ ภายในเครื่อง
ขั้นต่อไป ให้ต่อท่อใสขนาดใหญ่จากปั๊มสุญญากาศเข้ากับขั้วต่อสุญญากาศหลักของเครื่อง การเชื่อมต่อนี้สำคัญมาก เพราะหากไม่มีสุญญากาศที่แรง แคปซูลจะไม่สามารถแยกตัวได้อย่างถูกต้อง ส่งผลให้กระบวนการผลิตทั้งหมดหยุดชะงัก
ขั้นตอนที่ 2: ลำดับการเพิ่มพลัง
เมื่อการเชื่อมต่อทางกายภาพทั้งหมดได้รับการรักษาความปลอดภัยแล้ว ตอนนี้คุณก็พร้อมที่จะนำเครื่องกลับมาใช้งานได้แล้ว ทำตามขั้นตอนที่ถูกต้อง ขั้นตอนการเริ่มต้นเครื่องบรรจุแคปซูล เป็นสิ่งสำคัญ
ขั้นตอนที่ 5.1: เปิดสวิตช์ไฟหลัก
ค้นหาสวิตช์ไฟหลักแบบหมุนที่ด้านข้างเครื่อง หมุนปุ่มจากตำแหน่ง "ปิด" ไปที่ตำแหน่ง "เปิด" วิธีนี้จะส่งกระแสไฟฟ้าไปยังระบบหลักของเครื่อง เพื่อเตรียมพร้อมสำหรับการทำงาน
ขั้นตอนที่ 5.2: ปล่อยปุ่มหยุดฉุกเฉิน
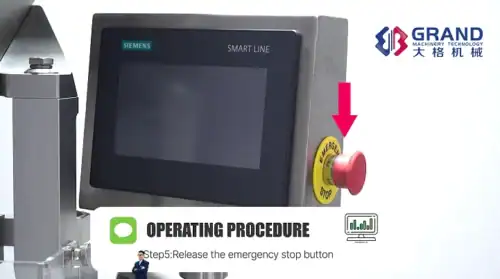
เพื่อความปลอดภัย เครื่องอาจอยู่ในสถานะหยุดฉุกเฉิน คุณต้องปลดปุ่มนี้ก่อนดำเนินการต่อ ปุ่มหยุดฉุกเฉินสีแดงขนาดใหญ่มักจะอยู่บนแผงควบคุมหลัก หากต้องการปลด ให้หมุนปุ่มตามเข็มนาฬิกาตามลูกศร คุณจะรู้สึกว่าปุ่มเด้งออกมา แสดงว่าเครื่องไม่ได้อยู่ในสถานะหยุดฉุกเฉินอีกต่อไป
ระยะที่ 3: การดำเนินการเบื้องต้นและการโหลด
เมื่อเครื่องเปิดอยู่และปลอดภัยต่อการใช้งานแล้ว คุณสามารถโต้ตอบกับอินเทอร์เฟซควบคุมและเตรียมวัสดุของคุณได้ ขั้นตอนสุดท้ายนี้ คำแนะนำเครื่องบรรจุแคปซูลกึ่งอัตโนมัติ จะทำให้คุณพร้อมสำหรับการทดลองใช้งาน
ขั้นตอนที่ 6: ไปที่แผงควบคุม
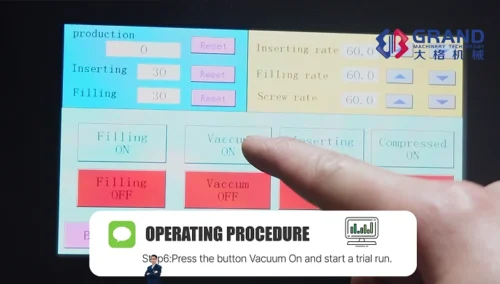
เครื่องจักรนี้มาพร้อมกับหน้าจอสัมผัส Siemens Smart Line หรือ HMI (Human-Machine Interface) ที่ใช้งานง่าย เมื่อเริ่มต้นใช้งาน หน้าจอควบคุมหลักจะปรากฏขึ้น ซึ่งคุณสามารถตรวจสอบและตั้งค่าพารามิเตอร์ต่างๆ เช่น อัตราการเติมและการใส่
สำหรับการเริ่มต้นใช้งานครั้งแรกนี้ ให้กดปุ่ม "Vacuum ON" บนหน้าจอ ปั๊มสุญญากาศจะทำงาน ช่วยให้คุณมั่นใจได้ว่าระบบทำงานได้อย่างถูกต้องก่อนเริ่มใช้งานผลิตภัณฑ์ใดๆ ขั้นตอนนี้ถือเป็นขั้นตอนสำคัญในการทดลองใช้งาน
ขั้นตอนที่ 7~9: โหลดแคปซูลลงในถังบรรจุ
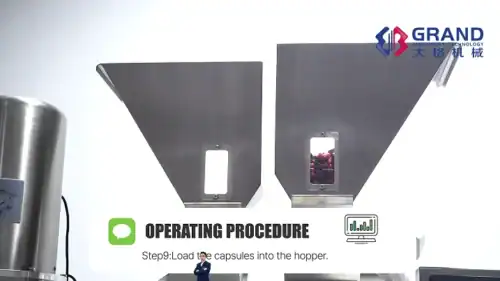
ขั้นตอนสุดท้ายในการตั้งค่าเริ่มต้นของเราคือการโหลดแคปซูลเปล่า เทแคปซูลลงในช่องป้อนแคปซูลสแตนเลส ช่องเล็กๆ บนช่องป้อนแคปซูลช่วยให้คุณตรวจสอบระดับแคปซูลได้ เพื่อให้แน่ใจว่าแคปซูลจะไม่หมดระหว่างการป้อนแต่ละครั้ง เครื่องนี้ออกแบบมาเพื่อรองรับกระบวนการโหลดนี้อย่างมีประสิทธิภาพ โดยป้อนแคปซูลเข้าสู่ระบบเพื่อแยกและบรรจุ
ขั้นตอนที่ 4: การเตรียมความพร้อมสู่วงจรการผลิต
เมื่อเครื่องเปิดอยู่และแคปซูลเปล่าในถังบรรจุ ขั้นตอนต่อไปคือการเตรียมสูตรและกลไกการคัดแยกแคปซูล
ขั้นตอนที่ 10: โหลดผงลงในถังเก็บ
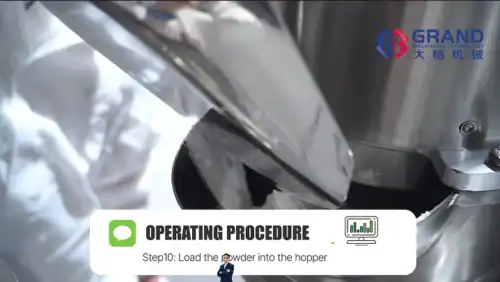
เทผงที่ชั่งแล้วลงในถังบรรจุผงอย่างระมัดระวัง ถังบรรจุผงสแตนเลสนี้ออกแบบมาเพื่อความสะดวกในการบรรจุและทำความสะอาด ใช้ที่ตักหรือกรวยเพื่อลดฝุ่นผงและให้แน่ใจว่าผงทั้งหมดถูกเทลงในถังบรรจุ ขั้นตอนนี้สำคัญอย่างยิ่งต่อการรักษาพื้นที่ทำงานให้สะอาดและรับรองความบริสุทธิ์ของผลิตภัณฑ์
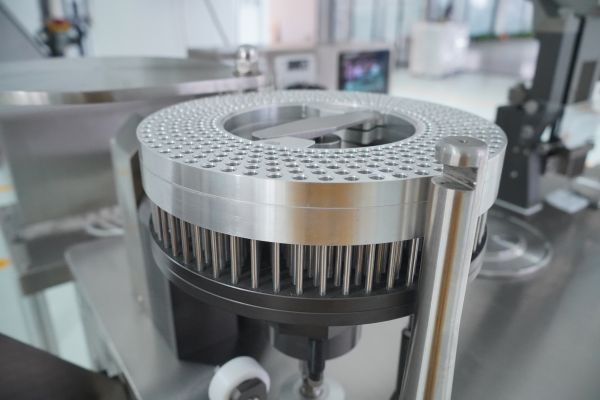
ขั้นตอนที่ 11: เตรียมชุดแหวนแคปซูล
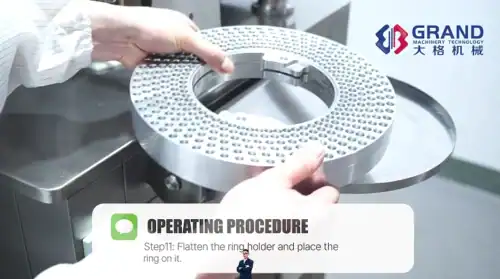
ชุดวงแหวนแคปซูลเป็นเครื่องมือที่ออกแบบมาอย่างแม่นยำสำหรับยึดแคปซูลในระหว่างการแยกและการบรรจุ นำชุดวงแหวนทั้งหมดมาวางบนแท่นยึดวงแหวนแบบแบนที่อยู่บนแท่นหมุนของเครื่อง ซึ่งจะทำให้ฐานมีความมั่นคงสำหรับขั้นตอนการบรรจุแคปซูลครั้งแรก
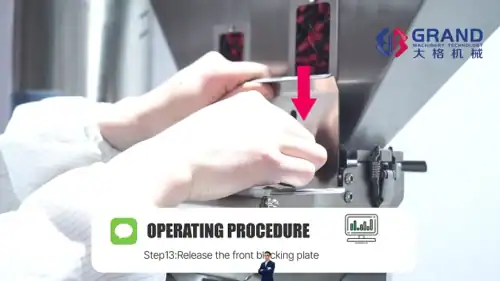
ขั้นตอนที่ 12~13: ปลดแผ่นปิดกั้นแคปซูล
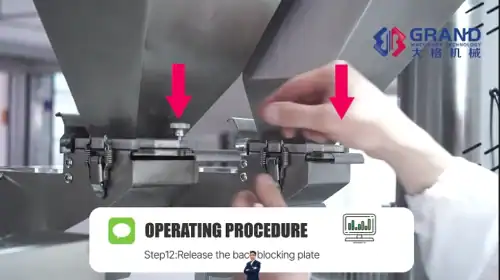
เพื่อให้แคปซูลเคลื่อนที่จากช่องป้อนเข้าสู่ช่องคัดแยกได้ คุณต้องปลดเพลทกั้นออก ขั้นแรก ให้ปลดเพลทกั้นด้านหลังออกก่อน จากนั้นจึงปลดเพลทกั้นด้านหน้า เพลทเหล่านี้ทำหน้าที่เป็นประตู เมื่อเปิดออก แคปซูลจะไหลเข้าสู่กลไกการวางแนวได้อย่างอิสระเมื่อเริ่มต้นการทำงาน
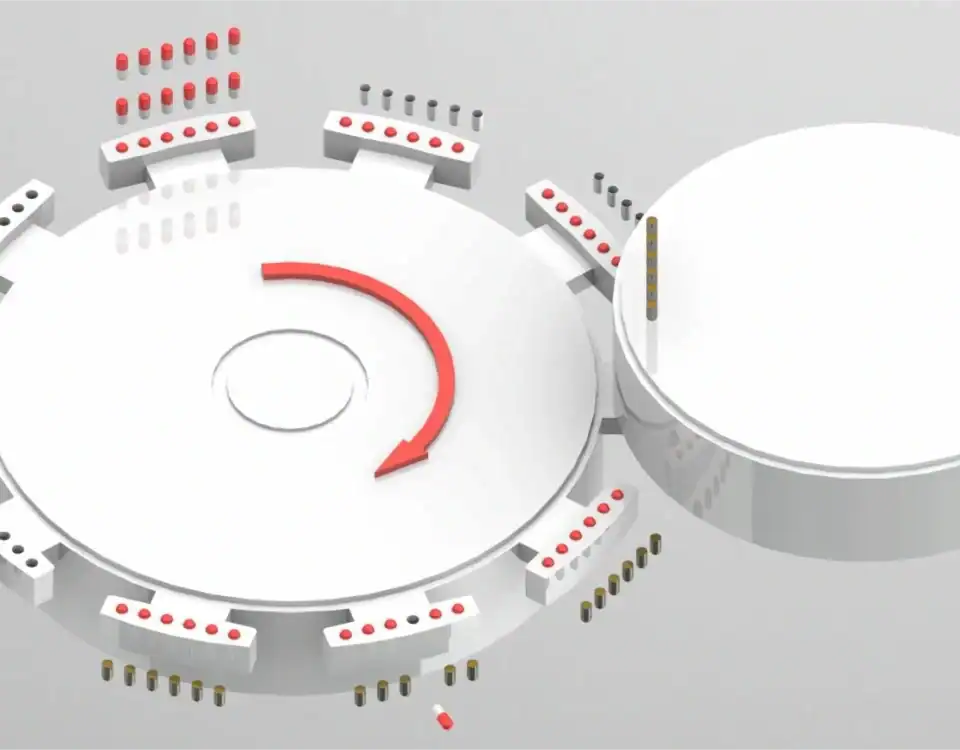
ขั้นตอนที่ 5: การเพาะและแยกแคปซูล
เฟสนี้ใช้กลไกอันชาญฉลาดของเครื่องจักรและระบบสุญญากาศเพื่อวางแคปซูลและแยกแคปซูลเพื่อการบรรจุ
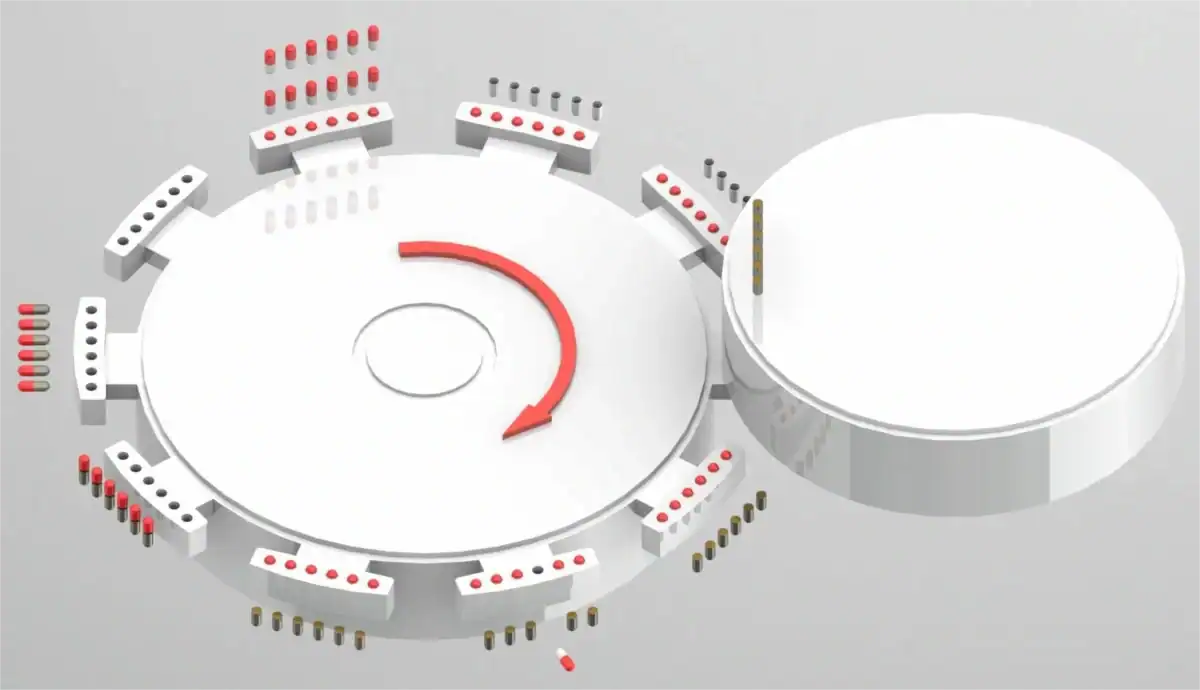
ขั้นตอนที่ 14~15: เริ่มการให้อาหารแคปซูล
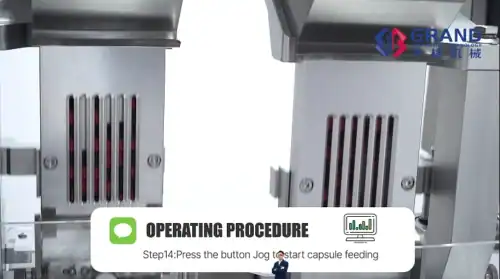
บนแผงควบคุม ให้กดปุ่ม "Jog" การทำงานนี้จะเปิดใช้งานกลไกการป้อนวัสดุ ซึ่งจะสั่นช่องต่างๆ เพื่อกระตุ้นให้แคปซูลที่บรรจุในส่วนที่ 1 เคลื่อนตัวจากช่องป้อนวัสดุหลักลงสู่รางแยกแต่ละราง
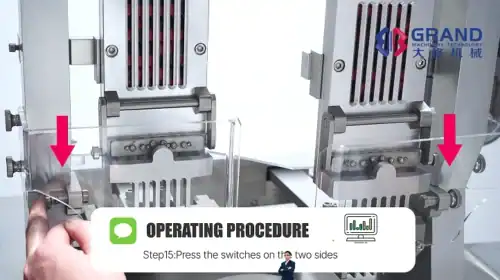
ขั้นตอนที่ 16~17: วางตำแหน่งและจัดวางแคปซูลด้วยตนเอง
จากนั้นกดสวิตช์แนวนอนที่อยู่ทั้งสองด้านของกลไกการคัดแยกพร้อมกัน การกระทำนี้จะช่วยให้แคปซูลเรียงตัวกันในรางได้อย่างเหมาะสม เพื่อให้แน่ใจว่าแคปซูลทั้งหมดเรียงตัวกันในทิศทางเดียวกัน (โดยทั่วไปคือคว่ำตัวลง) ก่อนจ่าย
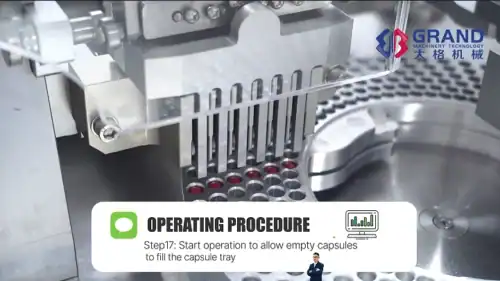
ตอนนี้ วางวงแหวนแคปซูลที่เตรียมไว้ลงบนแผ่นดิสก์หลักใต้รางคัดแยก เริ่มการทำงานผ่านแผงควบคุม จากนั้นเครื่องจะวางแคปซูลเปล่าที่เรียงตัวกันอย่างเรียบร้อยลงในแต่ละรูของถาดแคปซูล
ขั้นตอนที่ 18~19: แยกฝาแคปซูลออกจากตัว
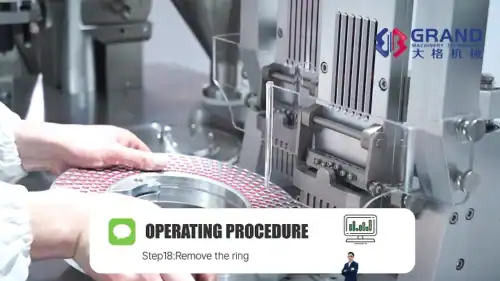
เมื่อแหวนเต็มแล้ว ให้นำออกจากสถานีเพาะเมล็ด ตรงจุดนี้ฟังก์ชันสุญญากาศมีความสำคัญอย่างยิ่ง สุญญากาศที่ใช้จากด้านล่างจะยึดตัวแคปซูลไว้ที่ส่วนล่างของชุดแหวน

ตอนนี้คุณสามารถยกส่วนบนของวงแหวนออกได้อย่างง่ายดาย ซึ่งบรรจุฝาแคปซูลทั้งหมดไว้ เหลือเพียงวงแหวนล่าง ซึ่งตัวแคปซูลเปล่าทั้งหมดถูกจัดเรียงอย่างเป็นระเบียบและเปิดออกเพื่อการบรรจุ วางวงแหวนยึดตัวแคปซูลนี้ลงบนแผ่นบรรจุของสถานีบรรจุผง
ขั้นตอนที่ 6: กระบวนการบรรจุและการตกแต่ง
คุณมาถึงขั้นตอนสุดท้ายและคุ้มค่าที่สุดแล้ว: การบรรจุ ล็อค และดีดแคปซูลที่บรรจุเสร็จแล้วของคุณ
ขั้นตอนที่ 20~21: ดำเนินการเติมผง
วางฝาครอบกันฝุ่นไว้เหนือสถานีบรรจุผงเพื่อให้มั่นใจว่ากระบวนการบรรจุสะอาด กดปุ่มที่หน้าจอควบคุมหลักเพื่อเริ่มรอบการบรรจุ เครื่องจะหมุนแผ่นบรรจุโดยอัตโนมัติ และกลไกการตวงจะเติมผงในปริมาณที่แม่นยำและสม่ำเสมอลงในแคปซูลแต่ละแคปซูล
ขั้นตอนที่ 22: ล็อคและดีดแคปซูลสุดท้ายออก
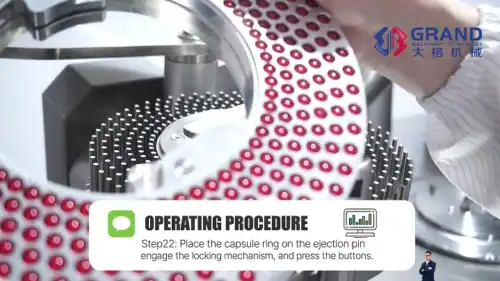
หลังจากบรรจุแคปซูลเสร็จแล้ว ให้นำวงแหวนที่บรรจุแคปซูลที่เตรียมไว้ก่อนหน้านี้มาวางทับวงแหวนของแคปซูลที่บรรจุแคปซูลแล้ว นำชุดประกอบที่ประกอบกลับเข้าที่สถานีสุดท้ายและเข้ากลไกการล็อก กดปุ่มเพื่อเริ่มกระบวนการล็อกและดีดแคปซูล เครื่องจะกดให้แน่นและสม่ำเสมอเพื่อเชื่อมแคปซูลและตัวแคปซูลเข้าด้วยกันอย่างแน่นหนา เพื่อปิดผนึกผงยาไว้ภายใน หลังจากนั้น หมุดดีดแคปซูลจะดันแคปซูลที่บรรจุเสร็จแล้วขึ้น พร้อมสำหรับการเก็บ
บทสรุป: วงจรการผลิตที่สมบูรณ์
ตั้งแต่การตั้งค่าเริ่มต้นจนถึงการดีดออกครั้งสุดท้าย ตอนนี้คุณมีความรู้ครบถ้วนแล้ว วิธีใช้ เครื่องบรรจุแคปซูล GRANDปฏิบัติตามคำแนะนำอย่างละเอียดในส่วนที่ 1 และส่วนที่ 2 เพื่อดูวิธีการบรรจุแบบกึ่งอัตโนมัติของ Grand Machinery ที่ช่วยเพิ่มประสิทธิภาพในทุกขั้นตอนการผลิต การผสมผสานระหว่างการควบคุมด้วยมือและความแม่นยำอัตโนมัติ ช่วยให้คุณผลิตแคปซูลคุณภาพสูงที่สม่ำเสมอได้อย่างมั่นใจและมีประสิทธิภาพ
พร้อมที่จะยกระดับการผลิตของคุณไปอีกขั้นหรือยัง? ติดต่อ Grandpackmachine วันนี้ เพื่อเรียนรู้เพิ่มเติมเกี่ยวกับวิธีที่โซลูชันการบรรจุแคปซูลขั้นสูงของเราจะสามารถเป็นประโยชน์ต่อธุรกิจของคุณได้อย่างไร
