GRAND Invited to CPHI & PMEC 2024 Shenzhen Pharmaceutical Exhibition

Top 10 vial filling machine manufacturers In The World(2024)
7 Maintenance Tips for Tube Filling Machine
When assembling a tube filling and sealing machine, attention must be paid to the following 7 aspects: placement, power supply, air pressure, cool water temperature, cleaning and maintenance of the tube trough. After purchasing the machine, please adhere to the following requirements for daily maintenance, so that damage to the machine can be avoided.
1. Placement

Please keep a distance of 1.8m from others
- The machine should be placed in a safe, clean, and well-ventilated location. The room temperature should be maintained between 18-26°C, and the relative humidity should be between 45-65%. Significant changes in humidity or exposure to toxic gases may damage the machine and prevent stable operation.
- The floor should be level to ensure each machine foot bears equal weight (adjustable feet are included).
- It is recommended that the machine be placed at least 1.8 meters away from any wall.
- The machine dimensions can be found on the nameplate.
- The floor should be treated to prevent slip.
- The machine does not need to be fixed to the floor.
- The machine is equipped with height-adjustable support points. If necessary, adjust the four points to ensure stable placement.
2. Power Supply
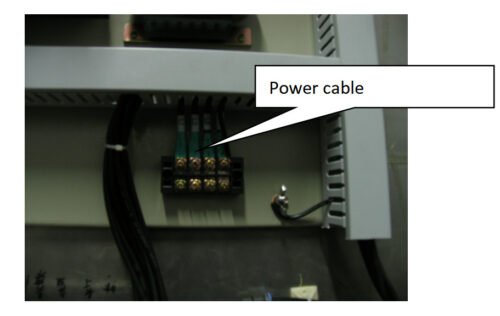 Power Setting
This machine requires an 220V 50HZ AC power supply (three-phase four-wire system; neutral wire ≥2.5mm²).
Once the machine is placed in the factory, connect the power cable to the terminal (in the electrical and air control box) with a standard cable.
3. Air Supply
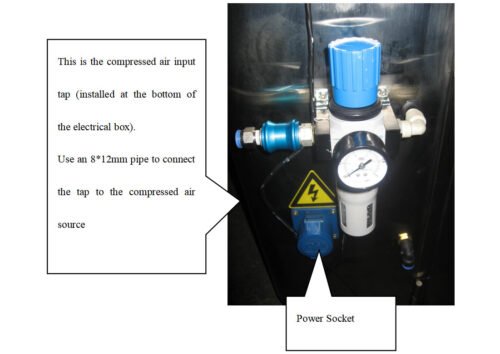
Air pressure setting
The machine requires a clean air supply (air pressure: less than 8kg/cm²; air volume: higher than 1.1m³/min). If there is no external air supply, an air compressor must be equipped. In addition, a multi-channel filter should be installed between the air compressor and the machine to keep the air clean. Once the machine is in place, connect an 8*12 mm pipe to the low-pressure control valve at the back of the electrical panel, and blow in the compressed air.
4. Water Chiller
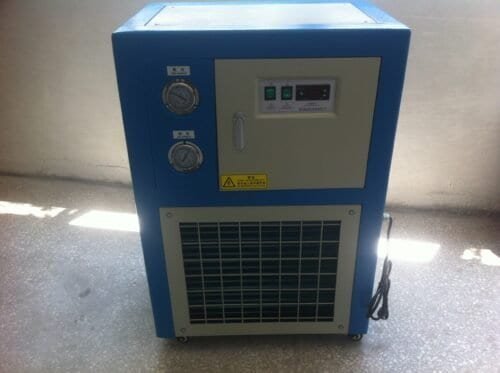
Cooling heater and sealing moudule
When the machine is running, the heater and sealing module need to be cooled by water, so a water chiller is necessary. The first step before running the machine is to connect it to the water chiller. Following is the breakdown of how to use it.
First, open the door of the water chiller and pour enough water into the tank (it needs to be filled up to 4/5 of the tank's height). Second, connect the two water circulation hoses to the heater, the base of the sealing module, the water tank, and the water pump, respectively. Third, insert the power plug of the water chiller into the lower socket at the back of the electrical enclosure(see the airpressure setting images). Fourth, turn on the water chiller and set the temperature on the operation panel (generally set to 15-18°C), while also checking all connection points for any leaks.
5. Jacketed Hopper and temperature control system (optional)
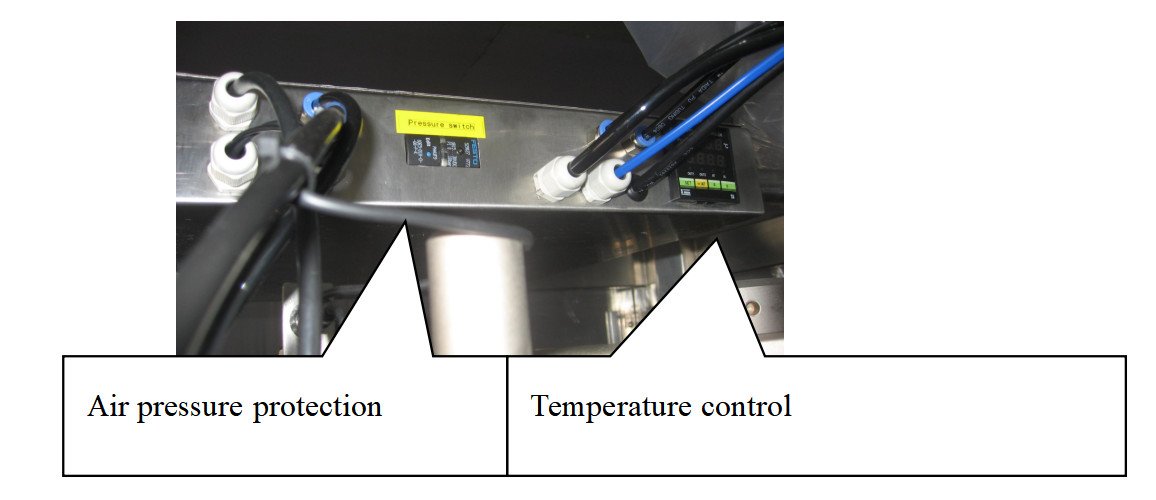
Connect the jacketed hopper and the temperature control system to the water chiller with two water hose connectors, one for the water inlet and the other for the outlet. And then insert an electric heating tube into the chiller.
After connecting the main machine with the water chiller, connect the upper and lower water circulation hoses to the outer layer of the jacketed hopper. The upper tube should be connected to the water inlet of the insulated water tank, while the lower one should be connected to the water pump of the tank.
After all the connections are completed, pour water into the tank and insert the plug into the socket. Press the power switch to activate the pneumatic insulation device, then set the temperature on the temperature control panel at the back of the electrical enclosure, while checking for any leaks at all connection points. The heated circulating water will start flowing, and the hopper temperature should match the set temperature.
6. Tube Trough
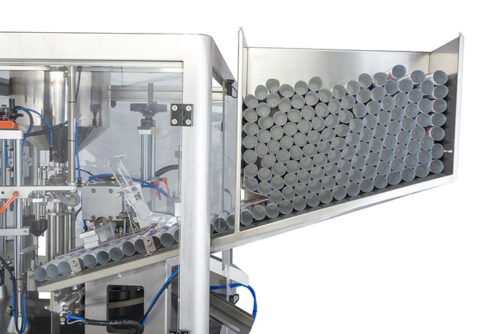
The tube trough is generally packaged with the main unit before assembly. Please clean its surface thoroughly, insert the support shaft into the two circular rings in the top left of the trough, and tighten the rear cover and the adjustable fixing screws. Or use tube fin machine to squeeze into empty tube shape, then wait for filling
7. Barrel Cover
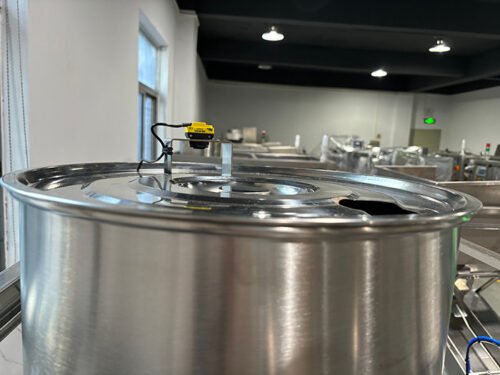
The drum cover is also packaged with the main unit and placed inside the tube trough. Please carefully unpack it to prevent damage, and wipe its surface clean. Afterward, place it on top of the drum (if liquid level monitoring is required, please insert the photoelectric monitor into the socket on the top of the electrical enclosure before placing the cover on the drum).
Conclusion
The above are 7 tips for maintaining the tube filling machine. Following these tips will extend the machine's daily service life and reduce the failure rate. If you are interested in purchasing a tube filling machine, you can check the machines list page or contact us!

